01_SERVLET/EX01/Ex02_servlet.java 설명
@WebServlet("/Ex01_servlet")
public class Ex01_servlet extends HttpServlet {
    private static final long serialVersionUID = 1L;

    /**
     * Default constructor.
     *
     * 1. 생성자
     *         생성자 호출 뒤 init() 메소드가 호출된다.
     */
    public Ex01_servlet() {
        System.out.println("생성자 호출");
    }

    /**
     * @see Servlet#init(ServletConfig)
     *
     * 2. init() 메소드
     *    1) 최초 한 번만 호출된다.
     *    2) 초기화 용도로 사용할 수 있다.
     *    3) init() 호출 뒤 service() 메소드가 호출된다.
     */
    public void init(ServletConfig config) throws ServletException {
        System.out.println("init() 호출");
    }

    /**
     * @see HttpServlet#service(HttpServletRequest request, HttpServletResponse response)
     *
     * 3. service() 메소드
     *    1) 실제 처리를 할 수 있다.
     *    2) 매개변수-1
     *       (1) 타입: HttpServletRequest
     *       (2) 변수: request
     *       (3) 사용자의 요청을 저장하는 변수이다.
     *           예) 사용자가 입력한 검색어, 아이디, 비밀번호 등이 저장된 곳이다.
     *    3) 매개변수-2
     *       (1) 타입: HttpServletResponse
     *       (2) 변수: response
     *       (3) 서버의 응답 정보를 저장하는 변수이다.
     *           예) 검색어의 결과, 로그인 성공 유무 등이 저장된 곳이다.
     */
    protected void service(HttpServletRequest request, HttpServletResponse response) throws ServletException, IOException {
        System.out.println("service() 호출");
        if (request.getMethod().equalsIgnoreCase("GET")) {  // GET방식의 요청이라면
            doGet(request, response);  // doGet() 메소드 호출
        } else {
            doPost(request, response);
        }
    }

    /**
     * @see HttpServlet#doGet(HttpServletRequest request, HttpServletResponse response)
     *
     * 4. doGet()
     *    1) GET 방식의 요청인 경우에 자동으로 호출되는 메소드이다. (service() 메소드가 없으면)
     *    2) GET 방식의 요청 방법
     *       (1) <form method="get">
     *       (2) $.ajax({ type: 'get', });
     */
    protected void doGet(HttpServletRequest request, HttpServletResponse response) throws ServletException, IOException {
        System.out.println("doGet() 호출");
        response.getWriter().append("Served at: ").append(request.getContextPath());
    }

    /**
     * @see HttpServlet#doPost(HttpServletRequest request, HttpServletResponse response)
     *
     * 5. doPost()
     *    1) POST 방식의 요청인 경우에 자동으로 호출되는 메소드이다. (service() 메소드가 없으면)
     *    2) 요청(request)과 응답(response)를 모두 doGet() 메소드로 넘기고 자신은 아무 일도 하지 않는다.
     */
    protected void doPost(HttpServletRequest request, HttpServletResponse response) throws ServletException, IOException {
        System.out.println("doPost() 호출");
        doGet(request, response);
    }

    /**
     * @see Servlet#destroy()
     *
     * 6. destroy()
     *
     *    웹 서버에서 프로젝트가 소멸되면 자동으로 호출된다.
     */
    public void destroy() {
        System.out.println("destroy() 호출");
    }

}
Ex02 response
@WebServlet("/Ex01_response")
public class Ex01_response extends HttpServlet {
    private static final long serialVersionUID = 1L;

    public Ex01_response() {
        super();

    }

    protected void doGet(HttpServletRequest request, HttpServletResponse response) throws ServletException, IOException {

        // 모든 코드 작성은 doGet()에서 진행합니다.

        // 사용자에게 보여 줄 응답(response)을 만듭니다.

        // 1. response에 content-type과 charset을 결정해 준다.
        //     1) content-type: 어떤 데이터(파일)를 보여주는 것이지 그 타입을 작성
        //    (1) html : text/html
        //      (2) css  : text/css
        //    (3) js   : text/javascript

        //  2) charset : 인코딩을 결정한다.
        response.setContentType("text/html");
        response.setCharacterEncoding("UTF-8");

        // 위 2개 코드는 한 줄로 작성해도 된다.
        // response.setContentType("text/html; charset=UTF-8");

        // 2. 출력스트림을 만듭니다.
        //       출력스트림은 response를 이용해서 만듭니다.

        // 바이트스트림 vs 문자스트림 어느 것을 쓸까? >> 문자 스트림(html은 모두 문자로 구성되기 때문에)
        // 참고, Reader와 Writer로 끝나면 모두 문자스트림

        // 문자 기반 출력스트림
        // 1. FileWriter
        // 2. PrintWriter
        // 3. BufferedWriter

        PrintWriter out = response.getWriter();

        // out 출력스트림은 print(), println(), printf() 등을 사용할 수 있습니다.
        // 이 중에서 가장 많이 사용되는 것은 println() 이다.
        // out으로 html 태그들을 만들어야 하니까 자동으로 줄이 바뀌는 것이 좋습니다.

        out.println("<!DOGTYPE html>");
        out.println("<html>");
        out.println("<head>");
        out.println("<title>서블릿으로 만든 제목</title>");
        out.println("<style> h1{color:red;</style>");
        out.println("<script>alert('반갑습니다.')</script>");
        out.println("</head>");
        out.println("<body>");
        out.println("<h1>안녕하세요</h1>");
        out.println("</body>");
        out.println("</html>");

    }

    protected void doPost(HttpServletRequest request, HttpServletResponse response) throws ServletException, IOException {

        doGet(request, response);
    }

}
request 객체의 정보 설명 1
protected void doGet(HttpServletRequest request, HttpServletResponse response) throws ServletException, IOException {

        // request 객체의 기본 정보
        String ip = request.getRemoteAddr();            // 요청한 사람의 IP주소 (중요)
        String contextPath = request.getContextPath();  // 컨텍스트패스 알아내기 (중요)
        String charset = request.getCharacterEncoding();// 사용자 인코딩 알아내기
        String contentType = request.getContentType();    // 컨텐트 타입 알아내기
        String method = request.getMethod();            // 전송타입(GET, POST) 알아내기


        // response 생성
        // 1. content-type, charset
        response.setContentType("text/html");
        response.setCharacterEncoding("UTF-8");

        // 2. 출력스트림 생성
        PrintWriter out = response.getWriter();

        // 3. 출력할 내용 만들기
        out.println("<!DOGTYPE html>");    // html5 의미
        out.println("<html>");
        out.println("<head>");
        out.println("<title>제목</title>");
        out.println("</head>");
        out.println("<body>");
        out.println("<h3>" + ip + "</h3>");
        out.println("<h3>ContextPath: " + contextPath + "</h3>");
        out.println("<h3>Charset: " + charset + "</h3>");
        out.println("<h3>contentType: " + contentType + "</h3>");
        out.println("<h3>method: " + method + "</h3>");
        out.println("</body>");
        out.println("</html>");

    }
request 객체의 설명2.
request
/*
     *    request
     *
     *     1. 사용자가 요청한 정보가 저장되는 객체
     *     2. request에 저장된 요청 정보는 "파라미터(parameter)"라고 한다.
     *     3. 모든 파라미터의 타입은 String or String[] 이다.
     *         1) String value = request.getParameter("parameter")
     *         2) String[] list = request.getParameterValues("parameter")
     *     4. request를 이용해 정보를 요청하는 방법
     *         1) <form> 태그의 모든 하위 폼 요소들은 submit하면 정보가 요청된다.
     *            사용자: <input type="text" name="id" /> submit 하면
     *            서버   : String id = request.getParameter("id"); 로 받아 들인다.
     *             * 태그의 name이 없을 경우 서버측에서 데이터를 받아들이지 못 한다.
     *         2) URL에 파라미터를 포함한다.
     *             URL: 호스트:포트번호/ContextPath/URLMapping?파라미터=값&파라미터=값
     */
다른 페이지를 포함하는 방법
- 정적 페이지: 바닥글
- 변하는 내용이 없는 페이지
<%@ include file="페이지" %>
- 동적 페이지: 머리글
- 변하는 내용이 있는 페이지
<jsp:include page="페이지"></jsp:include>
login.jsp
<%@ page language="java" contentType="text/html; charset=UTF-8"
    pageEncoding="UTF-8"%>

<% request.setCharacterEncoding("UTF-8"); %>

<%--
    주의. 태그 내부 주석은 위험합니다.
    header.jsp 페이지에 파라미터 title을 전달합니다.
--%>
<jsp:include page="../template/header.jsp">
    <jsp:param value="로그인" name="title" />
</jsp:include>


            <div class="login-box">
                <input type="text" name="id" placeholder="아이디" /><br/>
                <input type="password" name="pw" placeholder="****" /><br/><br/>
                <button>로그인</button>
            </div>


<%@ include file="../template/footer.jsp" %>
footer.jsp
<%@ page language="java" contentType="text/html; charset=UTF-8"
    pageEncoding="UTF-8"%>

    <!-- main-wrap 종료 -->
        </div>
    </div>
    <div class="foot-wrap">
        <a href="javascript:void(0)">기업체정보</a> /
        <a href="javascript:void(0)">저작권</a> /
        <a href="javascript:void(0)">약관</a>
    </div>
</body>
</html>
header.jsp
<%@ page language="java" contentType="text/html; charset=UTF-8"
    pageEncoding="UTF-8"%>
<%
    // 항상 header.jsp는 페이지의 제목을 받아온다.
    request.setCharacterEncoding("UTF-8");
    String title = request.getParameter("title");
    if (title == null || title.isEmpty()) {
        title = "마이MALL";  // 기본제목
    }
%>
<!DOCTYPE html>
<html>
<head>
<meta charset="UTF-8">
<title><%=title%></title>
<link rel="stylesheet" href="../assets/style/common.css">
</head>
<body>
    <div class="head-wrap">
        <ul>
            <li>홈</li>
            <li>방명록</li>
            <li>게시판</li>
            <li>리뷰</li>
            <li>Q&A</li>
        </ul>
    </div>
    <!-- main-wrap 시작 -->
    <div class="wrap">
        <div class="main-wrap">
index.jsp
<%@ page language="java" contentType="text/html; charset=UTF-8"
    pageEncoding="UTF-8"%>

    <link rel="stylesheet" href="assets/style/common.css">

    <% request.setCharacterEncoding("UTF-8"); %>

    <jsp:include page="/template/header.jsp">
        <jsp:param value="대문페이지" name="title"/>
    </jsp:include>

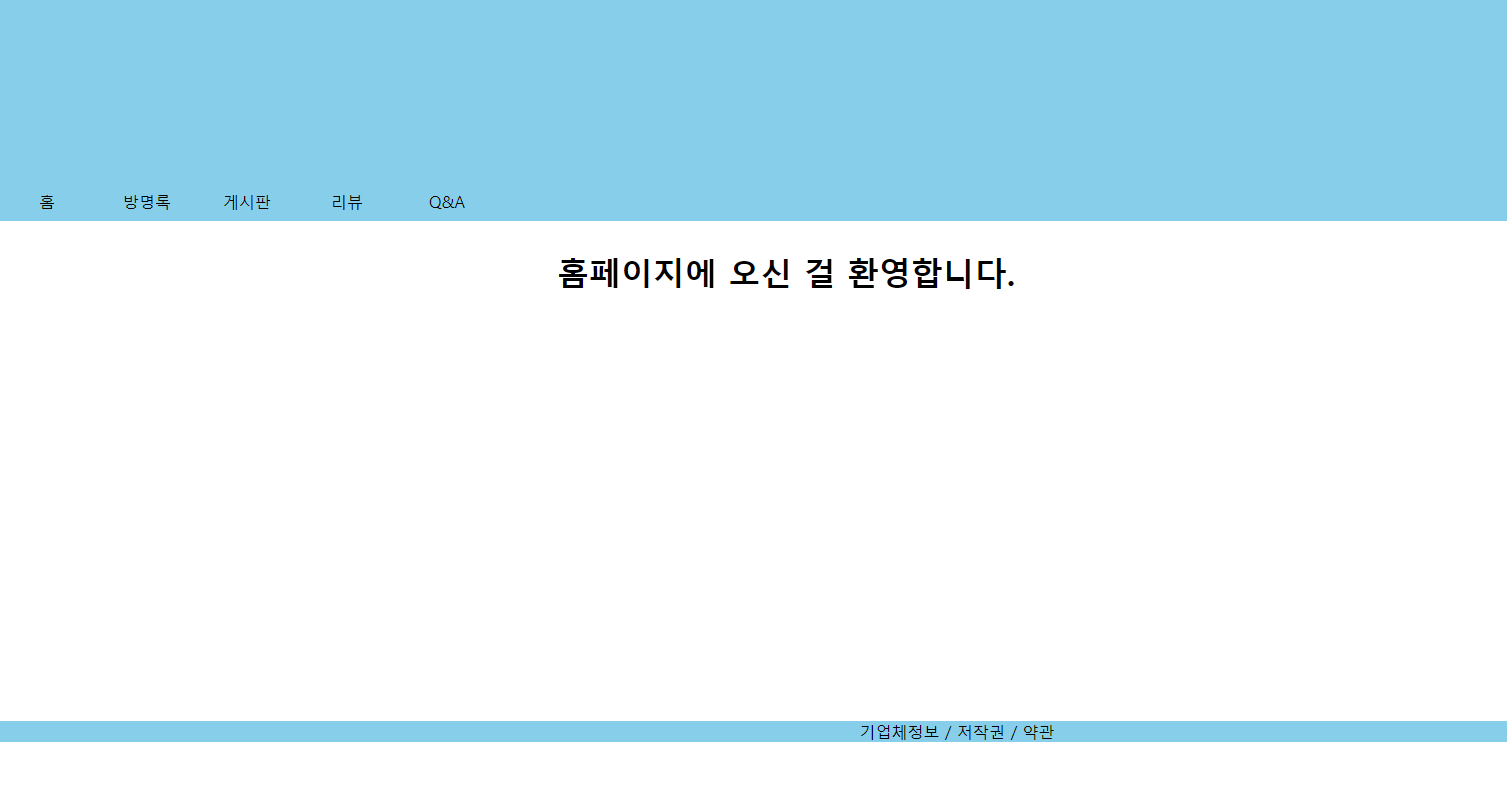
    <h1>홈페이지에 오신 걸 환영합니다.</h1>

    <%@ include file="template/footer.jsp" %>
결과 페이지
